The United Nations Educational, Scientific and Cultural Organization (UNESCO) estimates that around three million shipwrecks lie across the world’s ocean floors. Some shipwrecks date back thousands of years and hold historical information such as the shipwrecks of the Armada of Philipp II of Spain, ships of Christopher Columbus, and the Spanish galleons that linked America to Spain. But perhaps the most famous shipwreck of all is the RMS Titanic which was featured in James Cameron’s 1997 Hollywood blockbuster Titanic. Although some ancient shipwrecks are protected by the law and banned from marine exploration, there are wrecks that are accessible to the public. Some ships have been purposely sunk to create artificial reefs and habitat for many types of marine life.
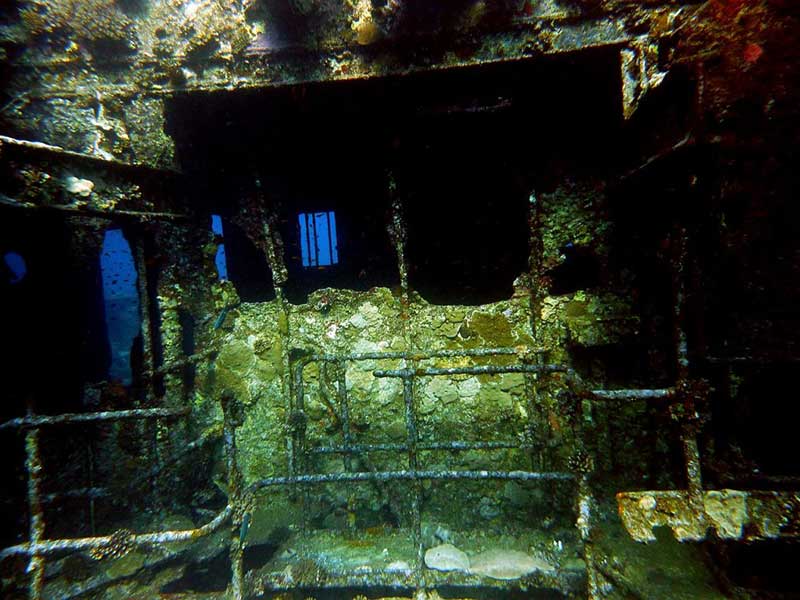
People have always been fascinated with underwater wrecks and the mysteries that surround them which paved the way for wreck diving – a form of recreational diving where divers explore the wreckage of ships, aircraft, and other artificial structures. One of the exciting and rewarding things you can do during your dive is shoot photos of the wreck.
Underwater photography takes time and practice to master but wreck photography can even be more challenging because of the size of the wreck, depth, limited light, and structural hazards. Here are some tips to help you capture fantastic wreck images.
Learn what you can about the wreck
Prior to the dive, do your research about the wreck, especially if it’s a huge site that may require a couple of dives to explore. Dig up what you can about the story behind it and the main parts of the wreck. If you have a map of the area, study it before diving and familiarize yourself with the ascent/descent line on the wreck and the direction of the bow and stern. Find out if there are any potential hazards that you should be aware of so you can take extra precautionary measures.
Do you know someone who has explored the same wreck? It’s a bonus if you do so you can get some advice about the best spots to focus your camera on, such as prominent features (e.g. wheelhouse, bow, engine, propeller, etc.).
Do away with bulky cameras and unnecessary gear
You don’t need a huge camera and other bulky gear to take good wreck shots since you might be swimming in narrow passageways. Carrying a big camera, no matter how cool the features are and excessive equipment will not only slow you down but can lead to potential underwater problems. The last thing you want to happen is for your gear to get snagged in metal objects or accidentally damage the fragile structure of the wreck.

Shoot wide
Wrecks are massive structures and their size gives you different alternative shots and angles. It is possible to take a photo of the entire ship from a distance, focus on different parts of the interior, or capture images of fish and other marine life within or just outside the wreck. A wide-angle lens will be your best asset if you want to capture awesome images.
A fisheye lens, a type of ultra-wide-angle lens allows you to focus closely, even if the subject is large and adds sharpness to your images. With the aid of a strobe, you can enjoy better colors because when the light travels a shorter distance it reflects off of the subject and on to your sensor. In addition, the distorted, spherical view referred to as the “fish-eye effect” will give your image a creative touch.
A rectangular lens is great if you want to emphasize hard lines; such as when taking a shot of a staircase. This kind of lens enhances your shooting distance to your area of focus. If you encounter curved lines at the edges of the photo, otherwise known as barrel distortion, it is recommended to provide some room around the edges for your underwater composition so you can crop out some of the barrel distortions in the final image.
Close-Focus Wide-Angle (CFWA) creates an interesting perspective as you capture your subject in the foreground and the wreck in the background, resulting in an image with depth. For instance, you can take a shot of a school of fish with the wreck exteriors in the background.
Use lights to your advantage
When shooting in enclosed areas, it is recommended to slightly increase your ISO and decrease the power of your strobe to as much as half since you won’t be needing strong light. As you get nearer to the subject, keep your strobes close to your housing and make adjustments depending on your lens. However, turn off your strobes if you are more than two meters away from your subject.
It also helps to take note of where the sun’s natural light is coming from. If the sun is behind you, expect a more natural shot but if the sun is behind the wreck, you will get a silhouette. To get the best exposure, increase your ISO and adjust your settings that best suit the sun’s direction.
Focus on recognizable objects
Find objects that people can easily identify such as a bow gun, a ship’s bell, or a propeller. It’s easier for your audience to appreciate the image and the skill involved in capturing the shot if they know what they are looking at.
Find a touch of color
When doing wreck photography, find something that can add color to your composition such as sea fans, sponges, corals, and other colorful marine life then include a recognizable area of the wreck.
Tell a story
Do you know what makes an underwater wreck image more compelling? It’s when the photo shows the natural beauty of the site but still gives viewers a glimpse of history.
Taking photographs of underwater wrecks is a rewarding and amazing opportunity but it requires excellent buoyancy and fin kicking techniques. The skills you’ll learn from our Deep Dive Course will prepare you if you want to explore fascinating dive sites like Inchcape 1 and Inchcape 2 in Fujairah.
Experiences
Find the perfect escape
© 2024 NEMO DIVING CENTER
Scuba diving is an exciting and adventurous water sport that offers a chance to explore the beauty of the underwater world and its amazing marine life. The UAE, particularly Dubai, is one of the most popular destinations for scuba diving, attracting divers from all over the world. With its crystal clear waters and diverse marine life, scuba diving in Dubai offers a unique and unforgettable experience.
The cost of scuba diving in Dubai varies depending on the dive center you choose and the type of dive you opt for. On average, a single dive can cost anywhere from AED 250 to AED 550, with the average price for a single dive being around AED 350. This price usually includes all the necessary equipment, such as the dive tank, regulator, and wetsuit, as well as the services of a professional dive guide. At Nemo Diving Center, We offer a wide range of diving packages to suit every budget and experience level.
Diving in Dubai is an incredible experience, and the UAE is home to many dive sites teeming with amazing marine life including colorful soft and hard corals, sea turtles, stingrays, manta rays, moray eels, cuttlefish, octopus, nudibranchs, seahorses, and a plethora of fish species. It is also noted for its incredible dive wrecks that have become rich artificial reefs. These dive sites offer a unique and exciting diving experience, providing a chance to explore sunken ships and other structures that have become havens for marine life.
Come and explore the unique underwater world of Palm Jumeriah in Dubai and incredible dive sites in Fujairah such as Dibba Rock, Sharm Rock, Martini Rock, Snoopy Island, and more. At Nemo Diving Center, we offer dive trips to these amazing dive sites, allowing divers to discover the incredible marine life that has made the wreck its home. We also offer a wide range of other dive sites to choose from, including shallow coral reefs, deep wrecks, and drift dives, providing something for every level of diver.
In conclusion, scuba diving in Dubai offers an unforgettable experience for all levels of diver. With its clear waters, diverse marine life, and incredible dive sites, Dubai is a must-visit destination for any scuba diver. Whether you’re a beginner or an experienced diver, our team at Nemo Diving Center will ensure that you have an amazing time exploring the beauty of the underwater world.
Click one of our contacts below to chat on WhatsApp
Social Chat is free, download and try it now here!
